How to Reset The Chrome Browser To Its Default Settings
Lawrence Abrams
- March 16, 2018
- Read 87,838 times
If your the Chrome browser starts to act slow, crashes, or displays unwanted advertisements, you can try restoring Chrome to its default settings. Doing this will erase all configuration information from Chrome such as your home page, tab settings, saved form information, browsing history, and cookies. This process will also disable any installed extensions, but all of your bookmarks, history, and saved passwords will be preserved.
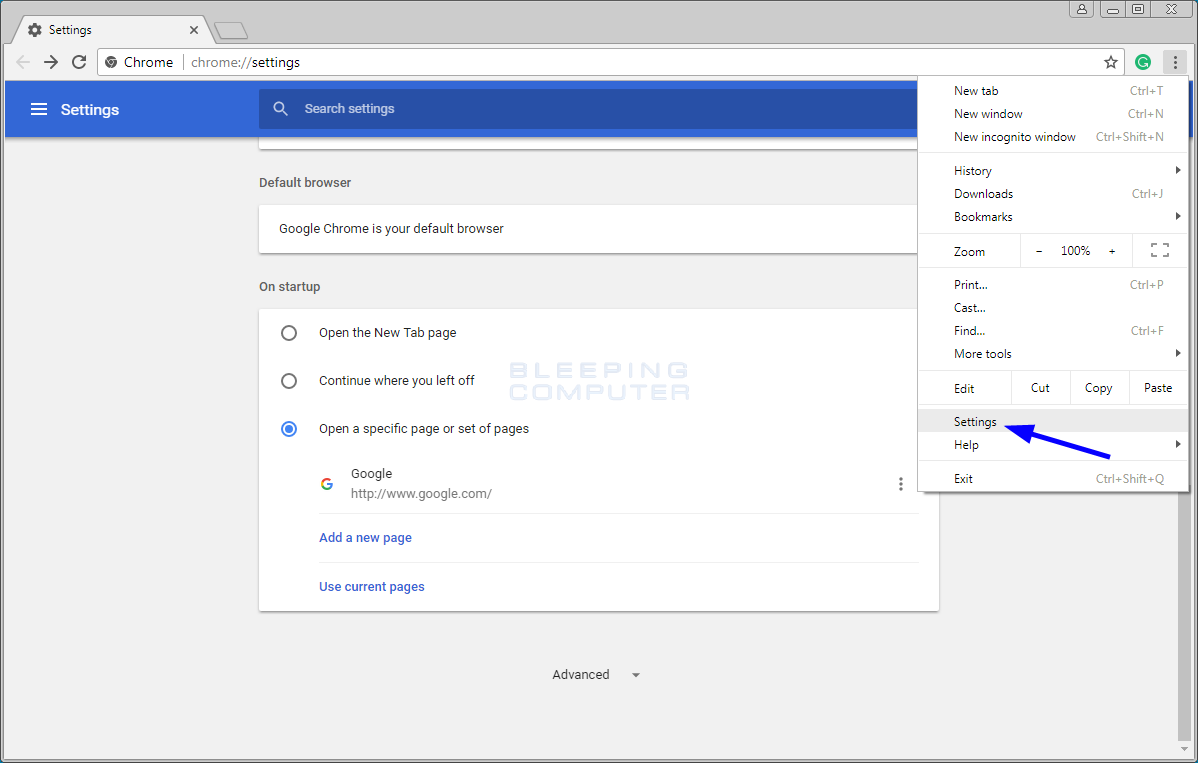
To reset Chrome, open the program and click on the Chrome menu button (![]() ) in the top right-hand corner of the window. This will open the main menu for Chrome as shown below.
) in the top right-hand corner of the window. This will open the main menu for Chrome as shown below.

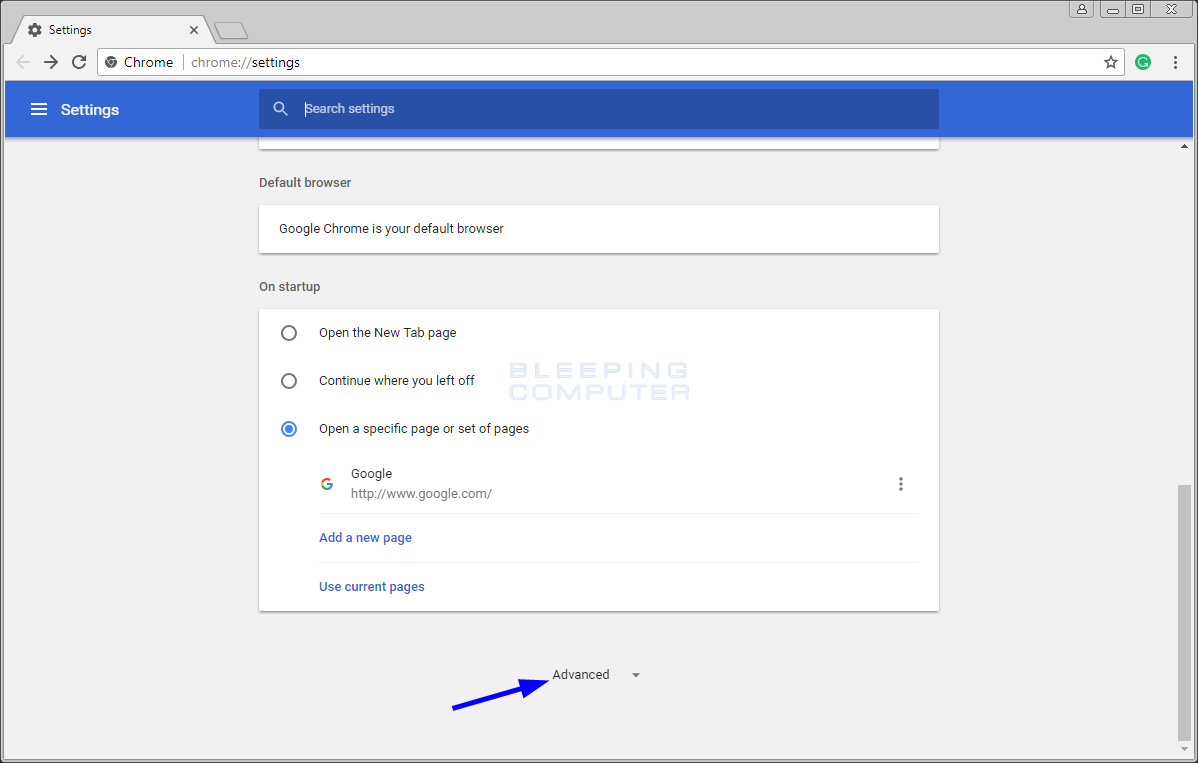
Now click on the menu option labeled Settings as shown by the arrow in the picture above, which will open the basic settings screen. Scroll down to the very bottom and you will see a Show advanced settings... option as shown in the image below.

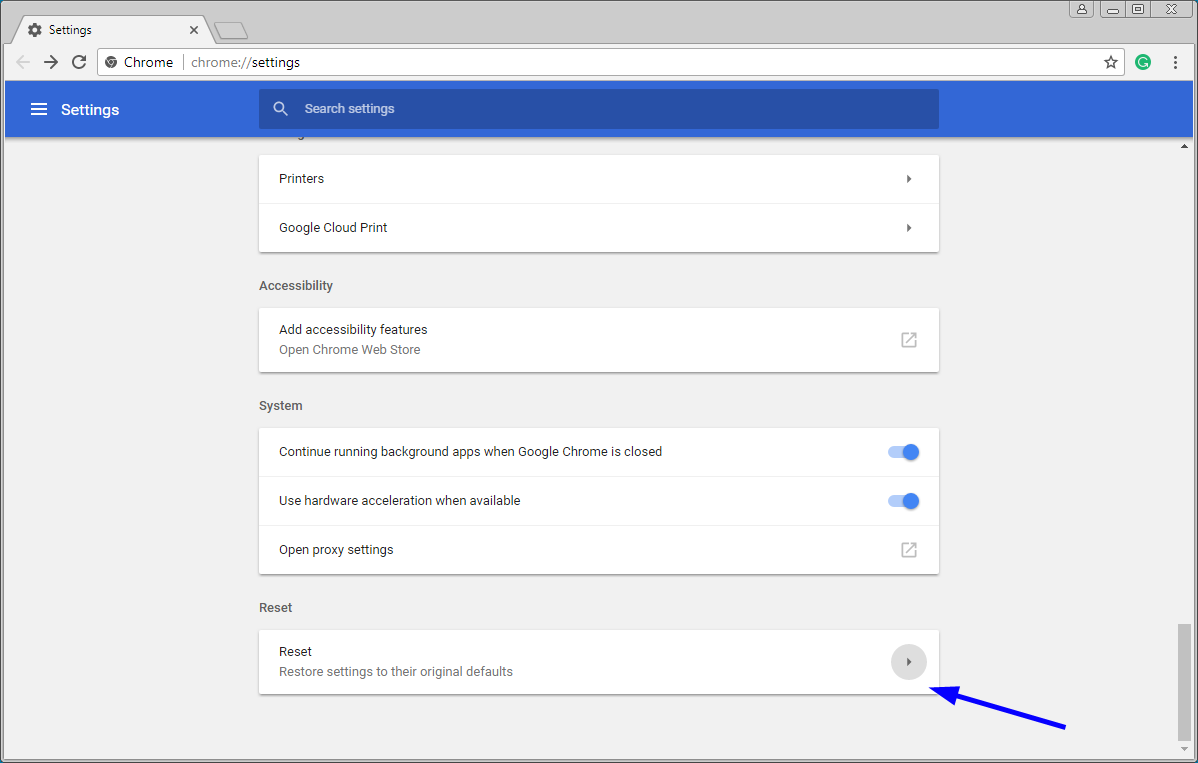
Click on the Show advanced settings... option to open the advanced settings screen. Scroll to the very bottom until you see the reset button as shown in the image below.

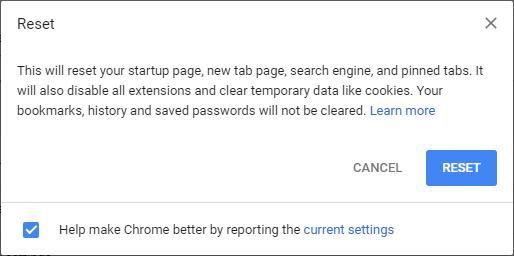
Now click on the Reset settings button as shown in the image above. Chrome will now open a confirmation dialog asking if you are sure you wish to reset your browser.

To reset Chrome, click on the Reset button. Chrome will now erase all your personal data, browsing history, and disable all installed extensions. Your bookmarks, history, and saved passwords, though, will remain intact and still be accessible.
You can now close the Settings tab and begin using your browser again. If your issues are now resolved, you can start enabling your extensions one-by-one to see if one of them was causing the unwanted behavior.


