How to resize, move, and create new App tile groups in Windows 8
Lawrence Abrams
- September 20, 2011
- Read 122,531 times
Table of Contents
- Introduction
- How to resize a Windows 8 Start screen tile
- How to move a Windows 8 Start screen tile
- How to create new Windows 8 Start screen groups
The Windows 8 Start screen is designed to make it so that you can easily resize and move tiles as well as make new tile groups. This allows you to organize the interface in a way that works best for you. The instructions below will explain how you can perform these tasks in the Windows 8 Start screen.
How to resize a Windows 8 Start screen tile
Windows Apps tiles also come in two sizes; a larger rectangle box that shows real-time information from the App or a small box that just displays the name and acts as a launcher for the main App interface. Being able to resize the App tiles allows you to maximize the screen space that is available by determining the Apps you want to display information directly on the Start screen and that just want as program launchers.
To resize an App, right-click on it with your mouse or hold your finger on it till it becomes checked. You will then see a panel open at the bottom of the Windows 8 Start screen where you can change its size.
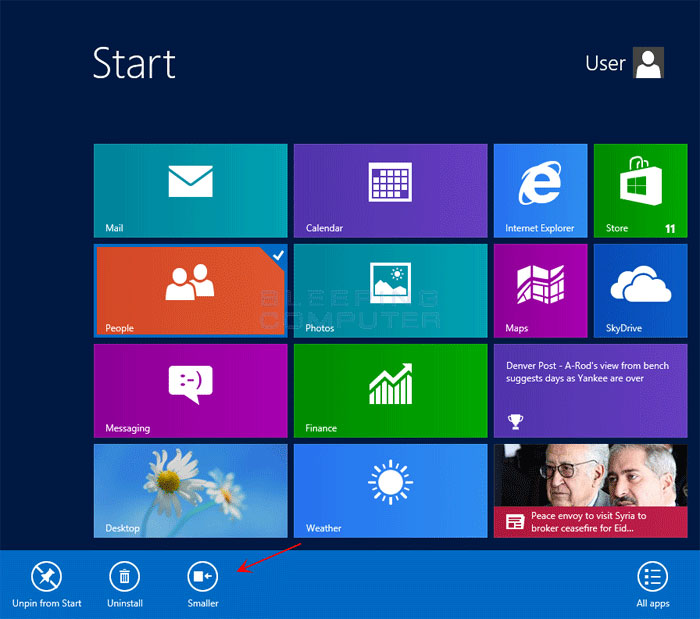
As you can see from the picture above, the People app is configured to be the larger rectangle. This allows it to display real-time information directly in the tile. If this information is not important to you and you would rather have more space available for another tile, you can click on the Smaller button as shown in the image above. Once you click on this button, the tile will be resized to be the smaller square that acts as a launcher for the main program.
If an App is already a small tile, all you have to do to make it larger is right-click on it or hold it and then select the Larger button. The App tile will then become the larger rectangle that displays real-time information on your screen.
How to move a Windows 8 Start screen tile
Moving a tile around the Windows 8 Start screen is as simple as dragging it with your finger or your mouse cursor. Simply left-click and hold the tile with your mouse or press down on the tile with your finger to grab onto the tile and drag it where you want. As you move it around the screen, you will notice that the tiles near it will move out of its way to indicate where the tile will be placed when you let get of the tile you are moving. This can be seen in the image below.
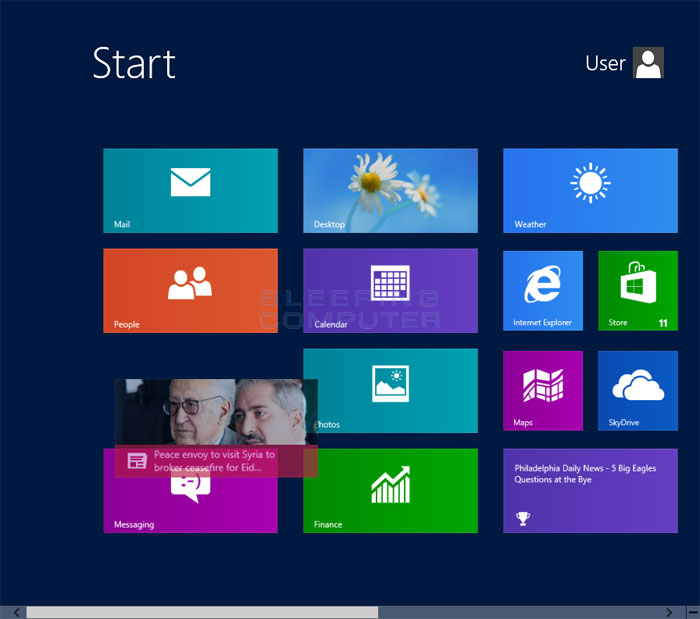
As you can see from the image above, when you hover the News App over the People and Messaging tiles, they move away indicating that the News tile will be placed between them. To add a tile to another tile group, simply drag the tile to that group and let go.
It is also possible to drag a tile to another page of the Windows Start Screen. To do this, drag the tile to the left or right border of your screen and the Start Screen will go to the next or previous page. You can then place the tile where you wish.
How to create new Windows 8 Start screen groups
Tiles in the Windows 8 Start screen can be be organized in different groups. To create a new group, simply drag a tile to an empty space on the Start screen. When you do so you will see the space expand around the tile. This can be see in the image below.
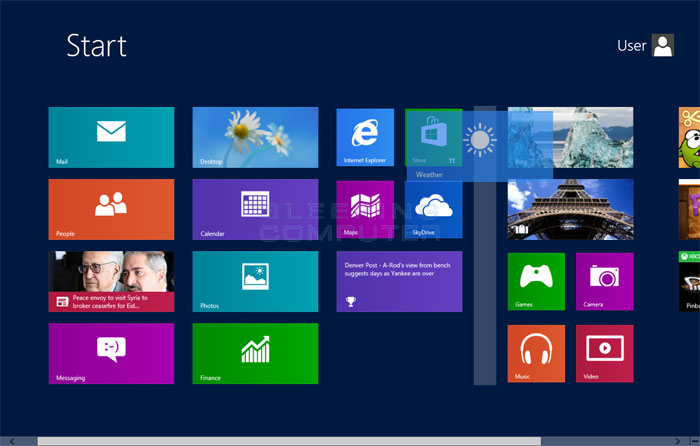
When you let go of the tile in this empty space, this tile will become the first tile in a new group on the Windows Start screen.
If you have any questions regarding these steps, please feel free to ask in the Windows 8 forum.


